



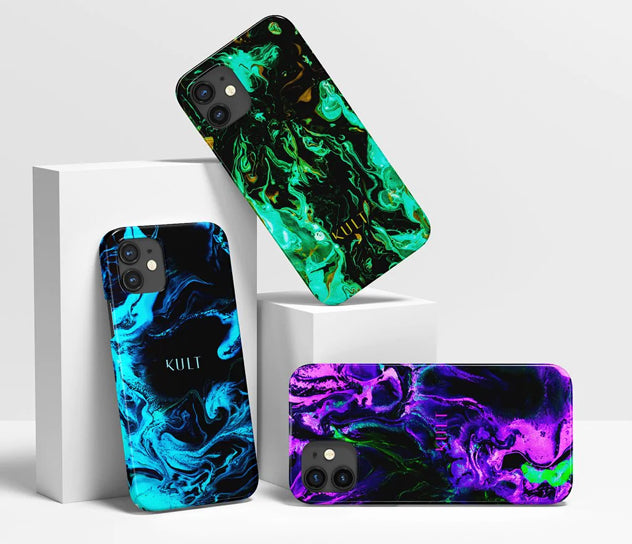


A plain phone case can kill the whole vibe. If your phone goes everywhere with you, it should look like it belongs in your outfit, your mirror selfie, and your everyday lineup. That is exactly why so many people search for how to customize phone case DIY ideas - not just to save money, but to make something that feels personal, current, and worth showing off.
The trick is making it look intentional, not like a last-minute craft project. A good DIY phone case should still feel clean, wearable, and practical enough for real life. Cute is great. Cute that survives your bag, your desk, and your daily drop risk is better.
How to customize phone case DIY without ruining the case
The first decision matters more than the design itself. Start with the right base case. If you use a super flimsy case, heavy paint, glue, gems, or resin can warp it or peel off fast. If you use a textured silicone case, many materials will not stick well at all.
The easiest base for DIY is usually a hard plastic or clear TPU case with a smooth surface. Clear cases work especially well if you want to layer prints, stickers, photos, or pressed flowers under the case instead of gluing everything on top. That gives you a cleaner finish and helps protect the design from scratches.
Before adding anything, wipe the case with rubbing alcohol and let it dry fully. That one step makes a huge difference. Oils from your hands can mess with paint adhesion, sticker hold, and even how evenly a marker lays down.
You also need to be honest about how you use your phone. If you drop it constantly, a heavily decorated case with raised charms may not be the best move. If your phone mostly lives on your desk or in a mini bag, you have more freedom to go bold.
Pick a DIY style that matches your aesthetic
The best custom cases usually have one clear point of view. That could be glossy and glam, soft and floral, edgy and graphic, or playful and Y2K. The mistake people make is trying to combine every trend at once.
If you love a clean fashion look, go for a minimal palette with one statement element like chrome stars, black line art, or a printed monogram insert. If your style is louder, lean into color blocking, neon decals, swirled paint, or layered collage pieces. Cosmic prints, abstract shapes, and sticker-bomb layouts can look amazing when the colors still feel coordinated.
A mood board helps more than people think. Pull a few references from your saved photos, outfits, nail looks, or room decor. If the same colors or shapes keep showing up, that is your direction.
Painted phone cases
Paint gives you the most freedom, but it is also the easiest way to end up with a messy finish. Acrylic paint works, but only if you apply thin layers and seal it properly. Thick coats crack faster and can feel tacky.
For a polished result, sketch your layout first with a pencil or removable marker. Swirls, checker patterns, tiny cherries, flames, smiley faces, and abstract blobs all work because they do not require perfect realism. If you want something more elevated, try tonal florals or a two-color graphic print.
Seal painted designs with a clear top coat that is made for craft surfaces and safe for plastic. Even then, expect some wear over time around corners and edges. Painted cases are best when you want a trend-forward look for a season, not necessarily forever.
Sticker and collage cases
This is one of the easiest answers to how to customize phone case DIY if you want low effort and high visual payoff. Use mini stickers, cutouts from packaging, photo booth strips, magazine letters, or printed art inserts. Clear cases are perfect for this because you can place the design underneath the case instead of exposing it directly.
That under-the-case method looks neater and lasts longer. It also lets you switch your design whenever your mood changes. Think of it like styling your phone the same way you style jewelry - swap it out when the outfit changes.
Keep the layout balanced. If every inch is covered, it can start to feel chaotic unless that is the exact look you want. Leaving a little negative space often makes the case feel more premium.
Gem, pearl, and charm cases
If you want your phone case to make a statement from across the room, this is the category. Flat-back pearls, rhinestones, and tiny metallic charms can turn a basic case into a full accessory. The catch is that these cases are less practical for pockets, wireless charging, and heavy daily handling.
Use strong craft glue in very small amounts and place pieces with tweezers for better control. Symmetry matters here. A random scatter can look cute, but only if the spacing feels deliberate.
For a more fashion-forward result, skip the giant novelty pieces and focus on a tighter edit. Mixed pearl sizes, silver stars, or a border detail around the camera cutout can feel more elevated than covering the whole case.
Materials that actually hold up
Not every pretty supply belongs on a phone case. Markers can smear. Cheap stickers can lift at the corners. Some glues yellow over time, especially on clear cases.
If durability matters, the safest options are printed inserts, vinyl decals, paint sealed with a top coat, and flat embellishments attached sparingly. Resin can create a glossy custom look, but it is harder to work with than social media makes it seem. It can drip, cure unevenly, or interfere with button fit if applied too thickly.
Pressed flowers look gorgeous, but they are delicate and can brown if not sealed well. Nail stickers and nail gems are a smart hack because they are designed for tiny decorative work and often come in trend-right finishes.
This is where the trade-off shows up. The more dimensional and detailed your case becomes, the less practical it usually is. If you want a case that still feels sleek, choose design over bulk.
How to make DIY look less homemade
A stylish case is not just about the design. It is about restraint. Clean edges, a limited color story, and a thought-out layout will always beat a case packed with random details.
Try working with two to four colors max. That keeps the final look more cohesive. If you are doing a collage or sticker case, repeat one motif a few times instead of using twenty unrelated icons.
Finish matters too. Smudges near the camera cutout, glue strings along the edge, and uneven top coat can ruin an otherwise great idea. Let each layer dry fully before touching the next step. Rushing is what makes a DIY case look cheap.
If you want that polished, fashion-accessory feel, design it like you would style an outfit. Choose one hero element, build around it, and know when to stop.
When DIY is fun - and when custom is smarter
DIY is perfect when you want a one-off look, a weekend project, or something playful you can change often. It is also great if you love crafting and do not mind that some designs are more short-term than others.
But if you want a case that looks highly designed, protects your phone, and holds up through everyday use, DIY has limits. Paint chips. Gems fall off. Clear cases can yellow. Handmade can be cute, but it is not always the best answer when you need real durability.
That is why a lot of style-focused shoppers use DIY for experimentation and choose a professionally made custom case when they want the final version. You get the self-expression without the wear-and-tear compromise. Brands like KULT live in that sweet spot - eye-catching design with actual protection, so your phone case still feels like part of your look instead of an arts-and-crafts project.
How to customize phone case DIY ideas by trend
If you want a current look, trend direction helps. Soft coquette styling works well with bows, tiny florals, lace-inspired prints, and pearl accents. Y2K looks good with chrome hearts, bright decals, airbrush-style lettering, and playful color mixes. Minimal fashion aesthetics lean better with monochrome graphics, checker details, abstract line work, or a single bold icon.
Season also changes what feels right. Summer can handle juicy colors, tropical florals, and neon. Fall usually looks better with tortoise patterns, warm browns, deep cherries, and moody cosmic tones. Matching your phone case to the season makes it feel intentional, like the rest of your accessories.
You do not need to copy every trend exactly. The strongest custom cases usually take one trend and make it personal.
Start with a case you would actually want to carry, not just post. If the design feels like you, fits your routine, and still gives your phone decent protection, you got it right.


